2014-04-22

My Latest Astro Image: Tips and Tricks for Star Trails


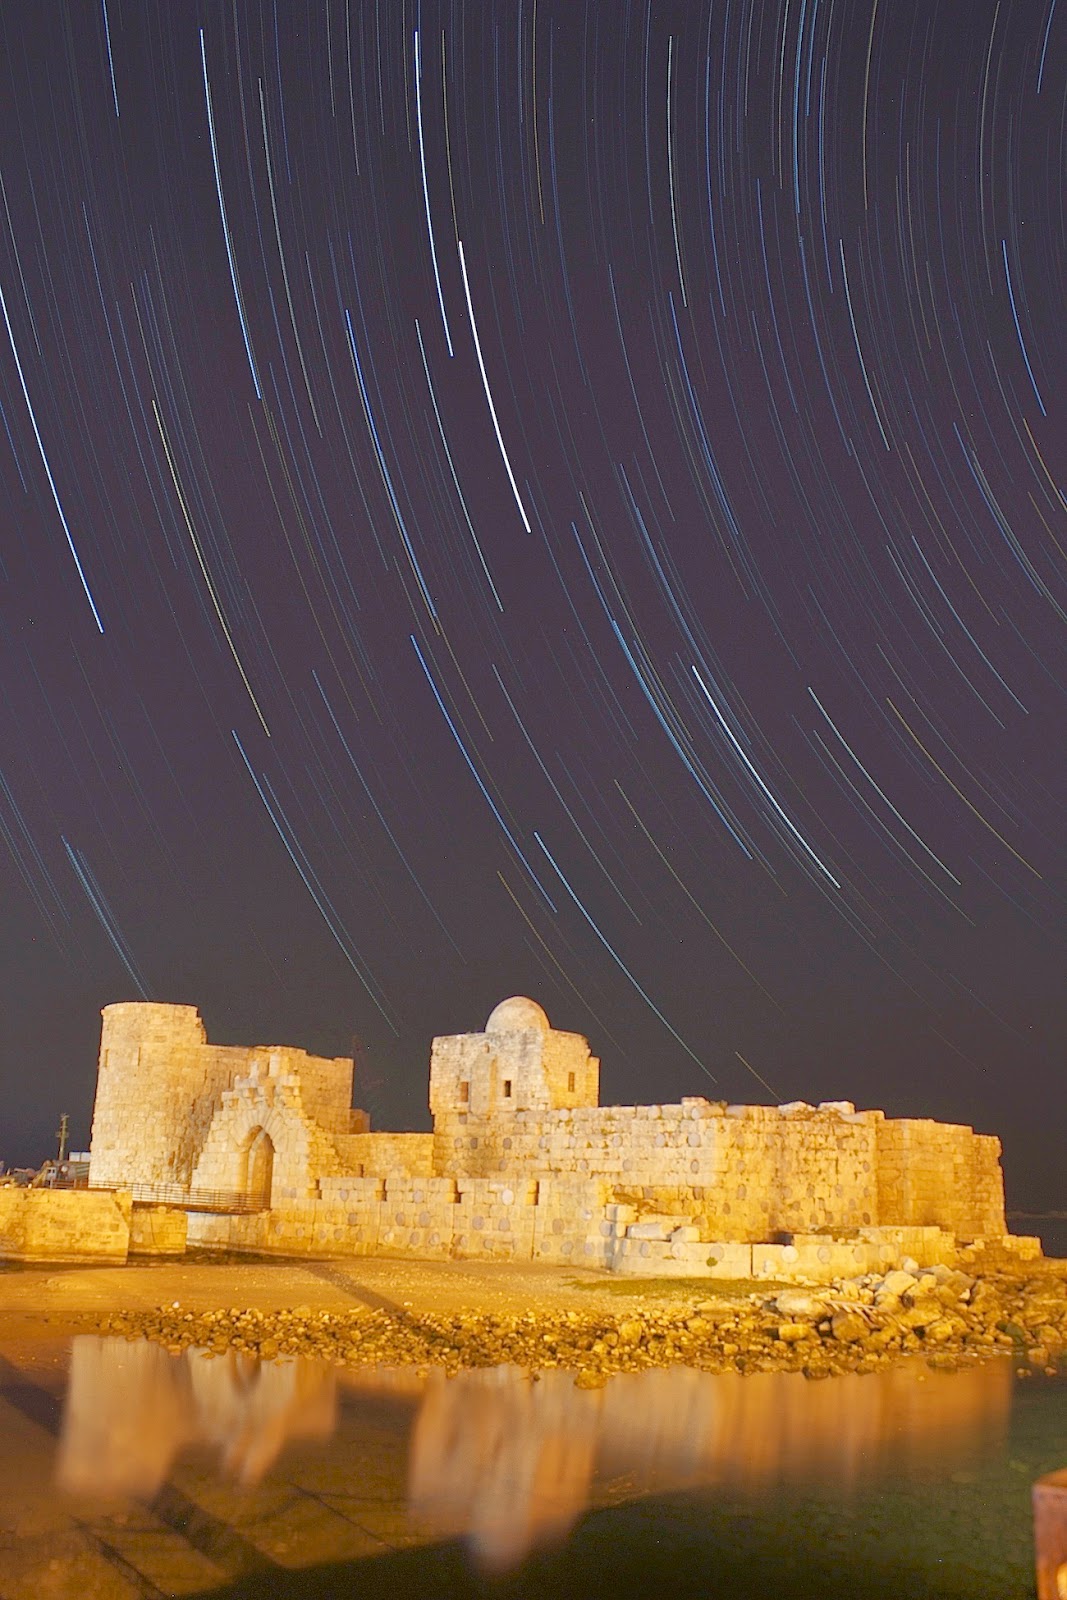
Here’s my latest astrophoto of star trails over Sidon’s Sea Castle. I’ll describe how I took it and hopefully convey a few tips and tricks for taking your own similar photos.


I’ve already written about what star trails are and the basics about taking them here: http://lebastrophoto.blogspot.com/2012/04/stellar-trails.html

I've taken star trails photos in the past, but I'm now trying to get more interesting Earthly scenery involved. In this case, I chose one of my home city's famed landmarks, the Sidon Sea Castle. 

My latest photo was taken using a DSLR camera on a tripod. This is all you actually need for a star trails photo, in addition to a cable release to lock the camera’s trigger for long or consecutive exposures. I took my gear to a local restaurant that had this wonderful view of the sea castle. I then positioned my camera-on-tripod in a corner of the restaurant that had an unobstructed view of the castle and the sky above. I was shooting from a relatively light polluted site, so I made sure to get at least a few relatively bright stars in the field. In this case, this required framing the castle and sky vertically to capture the maximum amount of stars. 

Before I started shooting, I focused my camera’s lens on a bright star; it turned out that at the distance I was shooting, the castle and stars were at the same focus. Once I framed the photo, I took several test-shots at different focal ratios. I chose a low ISO, which is always best, if you can, to reduce grain in your images. Once I found a focal ratio that did not over-expose the castle but still captured the stars, I started shooting! In this case, the surrounding lights were enough to illuminate the castle. In very dark sites, you may need to provide your own light source or use the Moon to illuminate foreground scenery. I took 30 second exposures with the camera’s continuous shooting mode. As described before, this technique helps minimize the effect of light pollution were you to take a single longer exposure with trails appearing in a single shot (which was the technique used in earlier film photography). I shot for around one hour, then took my camera home and loaded the images on my computer. Finally, I added the images to the free software StarStax ,which combined the individual 30 second frames into the final image with trails. I did some editing and touching-up in iPhoto, and voila! I hope you like the result!


Thanks for reading :)
and clear skies!

2012-08-21

Dark Frame Subtraction & Light Pollution

This is not an article explaining what a dark frame is or how to take one or how to subtract it from an image. It is only to share with you a few test images I made lately (my first actually); I am not relating the two topics (i.e; dark frame subtraction with light pollution!):

No dark frame subtraction
With dark frame subtraction

2012-07-10

Imaging Opportunity: Quadruple Conjunction

Hello again,

This time I am writing to raise your attention to a very amazing celestial conjunction, a quadruple conjunction.

The conjunction involves each of the "waning" crescent moon, Venus (brightest of all except for Crescent), Jupiter, and Aldebaran (alpha Tau).

You may also consider that around the conjunction there is the Pleiades & Capella!

Moonrise time and location prediction

This is an explanation on how to predict the exact location and time of a moon or sunrise. Since a telescope or a camera zoom lens have high magnifications, pointing your manually controlled telescope to the exact location of the moonrise is essential if you want to capture the moon as it rises above the horizon. Otherwise you might miss the first moments of the moonrise while you’re trying to readjust the telescope.

What you’ll need is:
  • Stellarium. You can get it from here
  • Google earth. You can get it from here.
Before you start you must find your observation location in Google earth and set the observation location in Stellarium to your coordinates. Your clock must be synchronized with Stellarium’s clock.

First I checked in Stellarium where the moon is going to rise. In my case it was somewhere around 115 degrees.

2012-07-02

Imaging Techniques -Part 1: Scenic Images

This post is one of a series of short posts on the three main astroimaging techniques; scenic, afocal, and prime focus. This series is also part of a larger series on the fundamentals of astroimaging which are based on a presentation was preparing a while ago. For today I will introduce you to the first, the scenic image which you naturally take quite often. As a start here's the definition of "scenic":
Scenic: Of or pertaining to scenery; of the nature of scenery; theatrical [1913 Webster]
As the definition implies, such an image is one of people or anything in the foreground along with some natural scene in the background. By natural scene I mean a scene of nature; a scene with trees or mountains or land or the horizon or anything Earthly or a combination of those.

This imaging technique is a relatively easy to use as people do it all the time, naturally; all that it requires is some perception. I chose this this particular technique for this post since a very nice imaging opportunity [1] is coming soon which you could use to both learn this imaging technique and to take a nice astroimage with relative ease. All you need is your cam and your tripod (or use your imagination & skills to position the cam on a surface with the right angle & direction; for example you could use a table mount, or an inclined book).

Conventions

This is to make a convention between us (me astrobob & you the reader) regarding some terms I use to ease any confusion that might arise due to those terms. Here's a list of the them and what I mean by them:

  • Date & Time
    • Date: 2012-06-06 (YYYY-MM-DD)
    • Time (HHMM hrs)
      • 0300 hrs = 03:00 AM
      • 1700 hrs = 05:00 PM
    • Examples
      • 2012-06-06 1200 hrs = 2012-06-06 12:00 PM (i.e; mid-day)
      • 2012-06-07 0000 hrs = 2012-06-06 12:00 AM (i.e; mid-night or start of new day!)
  • Words
    • image = photo (astroimaging = astrophotography)

Note: I'll update this list when required.

Thanks for reading :)
and clear skies!

2012-06-28

Venus Transit (2012): Some collected images

Here are my images of the transit (first two). They are not great the setting was not appropriate for astroimaging as I was participating in a public observing event.
I was able to catch these images in between observers:

Through my cams' zoom only!
You can see Venus in the upper centre!
Telescope eyepiece view @ 85x

And here's an image by my collaborator astroZ


Saida, Al Janoub; astroZ